
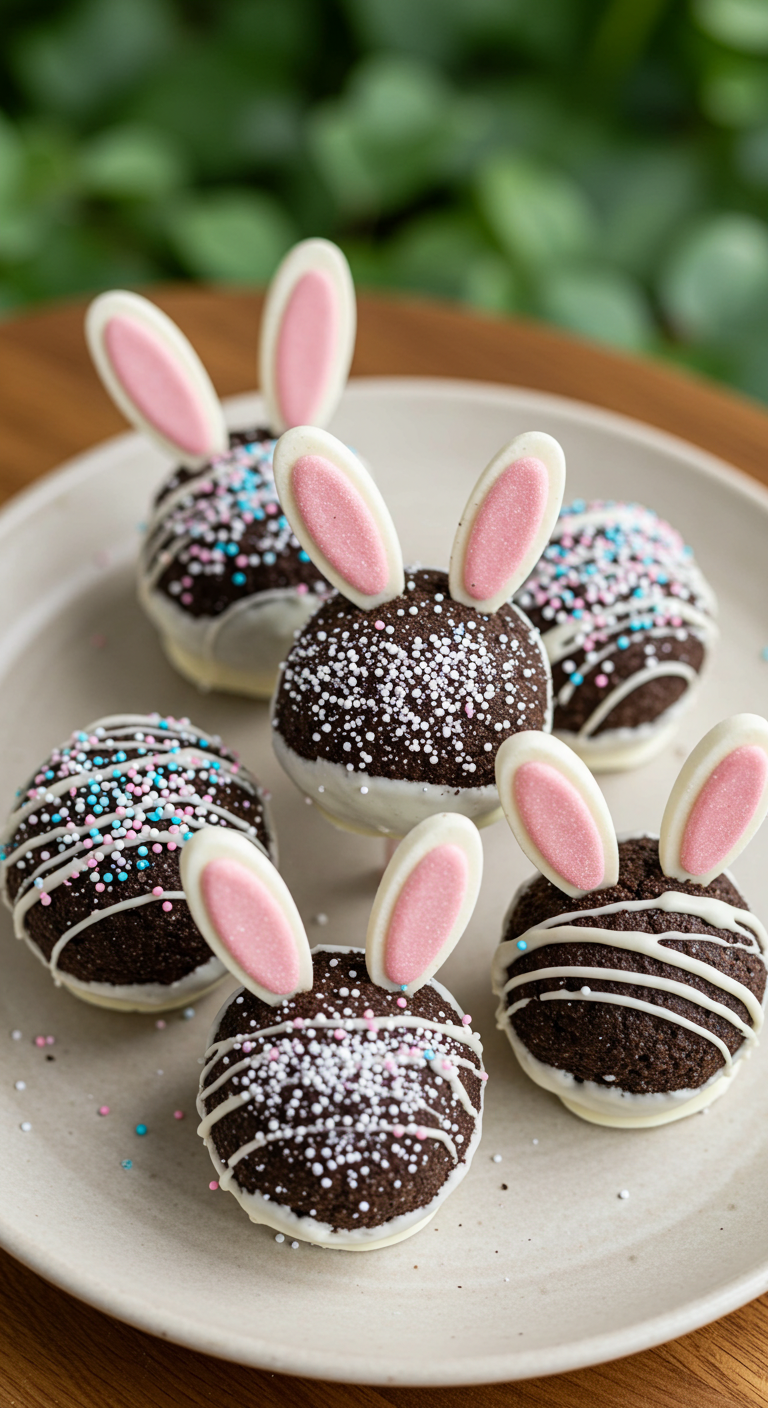

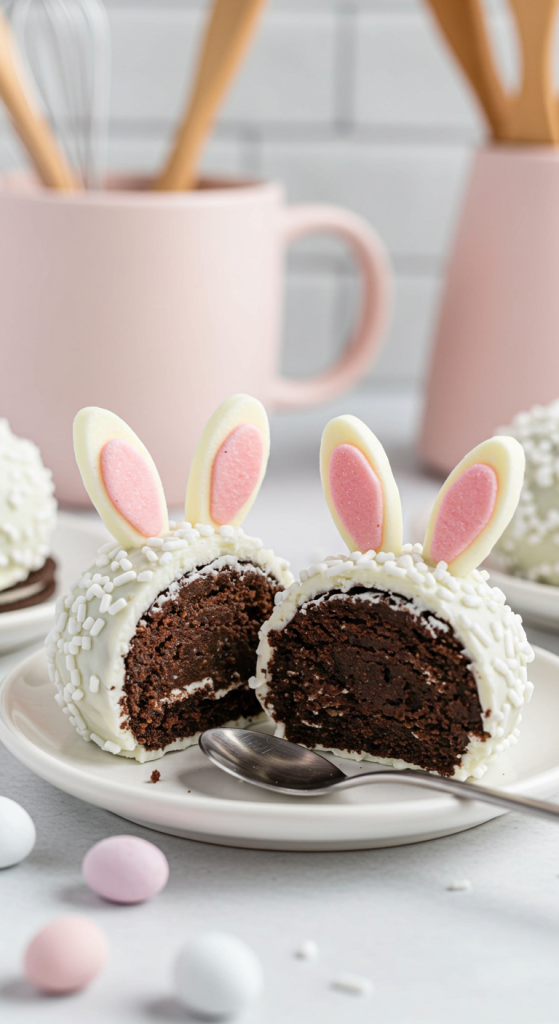
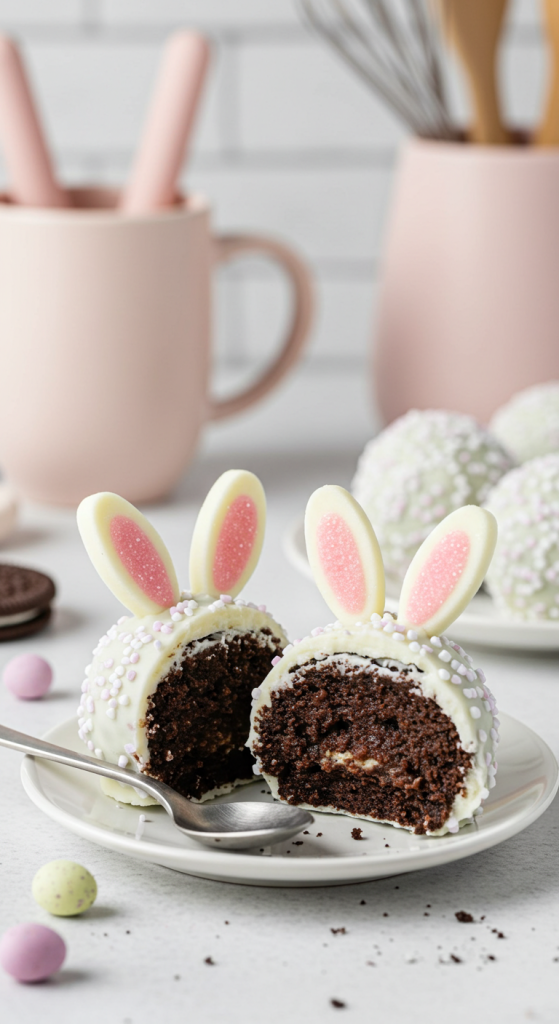
Every now and then, a dessert makes everyone at the table smile before they even take a bite. That was exactly the case with these Bunny Butt Oreo Balls. From the moment I began rolling the mixture between my palms to the final drizzle of white chocolate, I knew this would be one of the most delightful recipes I’ve ever created. They’re whimsical, adorable, and incredibly tasty.
The first time I served them was at an Easter gathering. I watched eyes light up and heard more than one giggle as people reached for the bunny-shaped treats. They have the nostalgic chocolatey comfort of Oreos, the creamy decadence of cream cheese, and the surprise pop of sweetness from white chocolate on top. It’s like a childhood memory and a grown-up indulgence all in one bite-sized package.
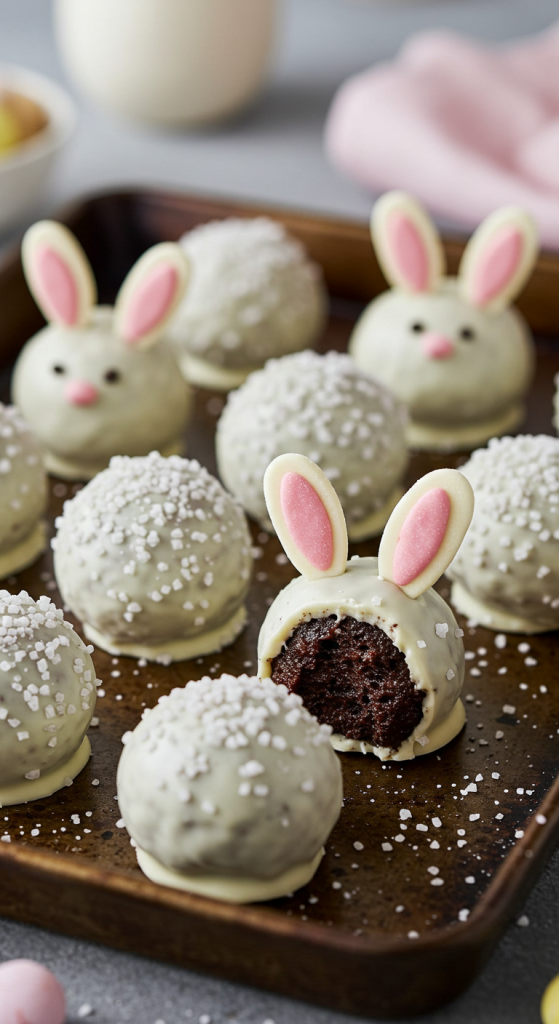
Making them is as fun as eating them. Shaping each bunny butt, decorating them with candy ears, and coating them with snowy sugar crystals gives you full permission to play in the kitchen. It’s a joyful project to share with kids or simply a therapeutic moment of creativity for yourself. Once you’ve made these, you’ll see just how perfect they are for birthdays, Easter brunches, baby showers, or just because.


Why You’ll Love This Bunny Butt Oreo Balls Recipe
This recipe combines fun and flavor in the best way. You’ll love how incredibly easy it is to make with only a few simple ingredients. The no-bake method means no oven fuss, and yet the results are every bit as charming and delicious as a baked good.
If you love Oreos, cream cheese, and white chocolate, then this treat hits all the right notes. Each ball is a blend of crunchy and creamy, with a hint of saltiness that balances out the sweetness beautifully. Plus, decorating them with bunny ears and coconut flakes or sugar crystals lets you be creative and festive without needing any fancy equipment.
They’re also make-ahead friendly. Whether you’re planning a party or prepping for a holiday spread, you can chill them in the fridge or freeze them in advance. Want even more delicious dessert inspiration? Don’t miss my other no-bake treats like the Cherry Topped Coconut Macaroons and Ooey Gooey Bars.
How to Make Bunny Butt Oreo Balls
Step 1: Crush the Oreos
Start by adding a full package of Oreo cookies to a food processor and pulsing until they become fine crumbs. If you don’t have a food processor, place them in a zip-top bag and crush them with a rolling pin.
Step 2: Mix with Cream Cheese
Add softened cream cheese to the crushed Oreos and mix until fully combined. You can use a hand mixer or just a sturdy spoon. The mixture should resemble thick, sticky dough.
Step 3: Roll into Balls
Scoop out about a tablespoon of the mixture and roll it into a smooth ball. Place the balls on a parchment-lined baking sheet. Once all are shaped, refrigerate them for at least 30 minutes so they firm up.
Step 4: Coat with White Chocolate
Melt white chocolate chips or candy melts in the microwave in 30-second intervals, stirring in between. Dip each chilled ball into the melted white chocolate and place them back on the tray.
Step 5: Decorate as Bunny Butts
Before the coating sets, sprinkle with sanding sugar or shredded coconut for a fluffy look. Press two candy ears (like pink heart-shaped candies or mini marshmallow halves) on top to create the bunny ears. Let them set completely in the fridge.
Recipe Variations and Possible Substitutions
If you want to mix up the flavors, try using golden Oreos or even mint-flavored ones. The cream cheese can be swapped with a dairy-free alternative for a vegan-friendly version. White chocolate can be replaced with pastel-colored melts to match holiday themes.
You can also make them smaller for bite-sized party treats or use different candy toppers for ears. Crushed nuts or freeze-dried strawberries could also add a crunchy coating twist. The base recipe is so adaptable, you can truly make it your own.
Serving and Pairing Suggestions
These Bunny Butt Oreo Balls are perfect as a centerpiece on any spring or Easter dessert table. Arrange them on a white ceramic platter with pastel-colored candies scattered around for extra charm. They also look adorable placed in mini cupcake liners to make serving easier and tidier.
Pair them with a warm drink like vanilla chai tea, a creamy latte, or even a cold glass of milk for a nostalgic touch. They also go wonderfully with a fresh fruit platter or light lemon bars if you want to balance the richness with something zesty.

Storage and Reheating Tips
To keep them fresh, store your Bunny Butt Oreo Balls in an airtight container in the refrigerator for up to 5 days. If you want to make them ahead for a party or holiday, they freeze well for up to 2 months. Just place them in a single layer in a container and separate layers with parchment paper.
Let them thaw in the fridge overnight before serving. These treats are best enjoyed cold or at room temperature, so no need for reheating.
Frequently Asked Questions
Can I make Bunny Butt Oreo Balls ahead of time?
Yes! These are perfect for making in advance. Just store them in the fridge for up to 5 days or freeze for longer storage.
Can I use a different kind of cookie?
Absolutely. Golden Oreos, chocolate chip cookies, or even graham crackers work, though the flavor and texture will vary slightly.
What can I use instead of cream cheese?
You can substitute with mascarpone, dairy-free cream cheese, or even cookie butter for a different flavor twist.
How do I stop the white chocolate from seizing?
Make sure your bowl and utensils are completely dry. Water causes chocolate to seize. Melt slowly and stir often.
Can kids help with this recipe?
Definitely! Kids will love rolling the mixture into balls and decorating with bunny ears and sprinkles. Just make sure an adult handles the melted chocolate.
Related Recipe You’ll Like
If you adore playful desserts like these Bunny Butt Oreo Balls, then you’ll definitely want to try the Cherry Topped Coconut Macaroons. They offer that same no-bake simplicity with a sweet, chewy texture and a colorful finish. For a richer treat, the Ooey Gooey Bars bring bold flavors and fudgy satisfaction. If you’re hosting a gathering, pair these with the Red Lobster’s Cheese Biscuit Loaf to add a savory element that balances out your dessert table beautifully.
Save and Share This Recipe for Later
Don’t let this adorable dessert idea slip away! Be sure to pin this Bunny Butt Oreo Balls recipe to your favorite dessert or holiday board on Pinterest. Whether you’re planning your next Easter brunch or just want a cute surprise treat, having it saved makes it easy to find again.
You can also share it with friends and family through social media or email. It’s a perfect recipe to make together, gift in a box, or serve at parties. Everyone loves a dessert that makes them smile before they even taste it. So go ahead, spread the sweetness!
Bunny Butt Oreo Balls Recipe

These Bunny Butt Oreo Balls are a whimsical and festive no-bake dessert, made with crushed Oreo cookies, cream cheese, and a white chocolate coating. Each ball is decorated with candy bunny ears and sprinkled with sugar or coconut to resemble an adorable bunny bottom. Perfect for Easter celebrations, springtime parties, or just a fun treat to make with kids, this recipe is easy, make-ahead friendly, and bursting with cookies-and-cream flavor.
Ingredients
- 1 package Oreo cookies (about 36 cookies)
- 8 oz cream cheese, softened
- 12 oz white chocolate chips or white candy melts
- Sprinkles, sanding sugar, or shredded coconut (for topping)
- Pink heart candies or mini marshmallows (for ears)
Instructions
- Crush Oreo cookies in a food processor until fine crumbs form.
- Add softened cream cheese and mix until fully combined.
- Roll the mixture into 1-inch balls and place them on a parchment-lined baking sheet.
- Chill in the refrigerator for 30 minutes until firm.
- Melt white chocolate chips or candy melts in the microwave in 30-second intervals, stirring between each.
- Dip each ball into the melted chocolate and return to the tray.
- Before the coating sets, decorate with sprinkles, sugar, or coconut, and place candy ears on top.
- Let them set completely in the fridge before serving.
Notes
- Make sure the cream cheese is fully softened for easier mixing.
- Keep utensils dry when melting chocolate to prevent seizing.
- Store in an airtight container in the fridge for up to 5 days or freeze for up to 2 months.
- This recipe is perfect for kids to help with, especially during the decorating step.
- You can use flavored Oreos or alternative cookies for a unique twist.