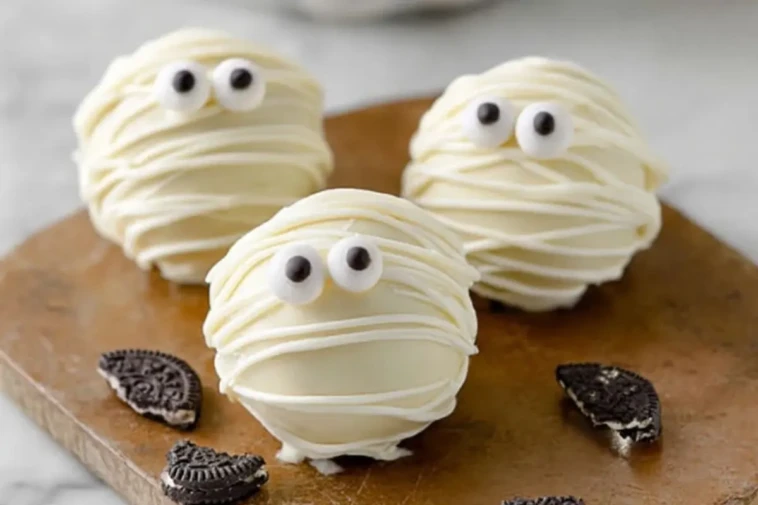

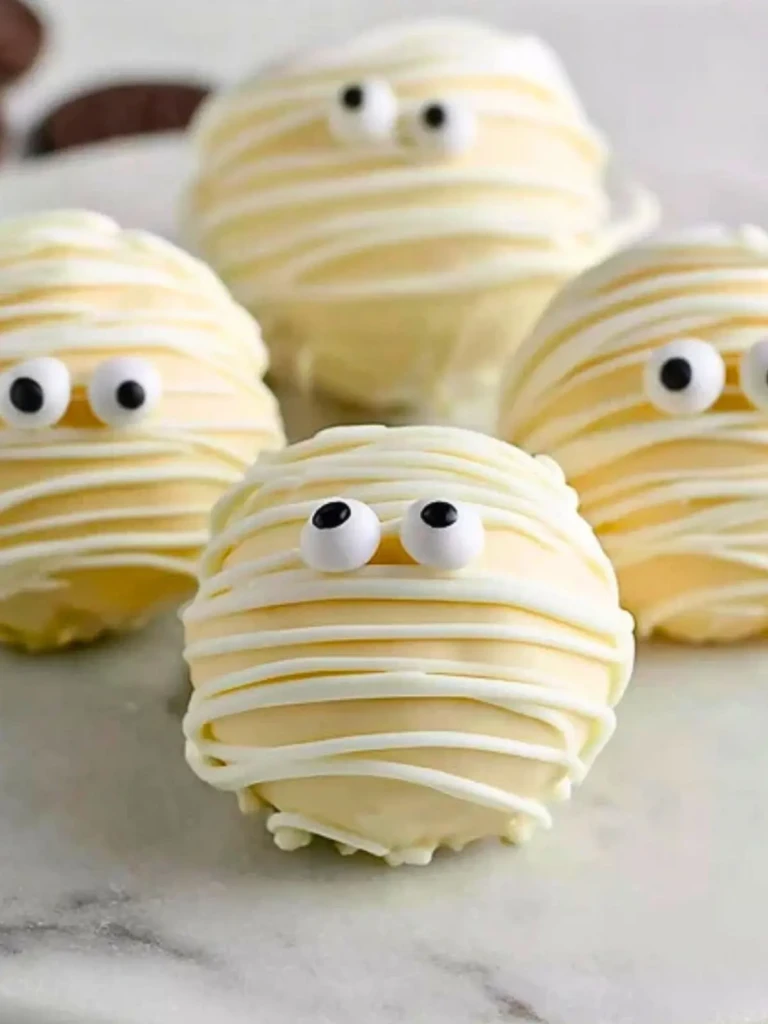
These Mummy Oreo Balls are a playful and spooky treat perfect for Halloween or any fun party spread. They deliver a rich chocolatey bite wrapped in a white chocolate shell, with a charming mummy face that kids and adults alike can’t resist. Every bite is a mix of silky cream cheese and crushed Oreos, wrapped in a sweet vanilla coating and topped with edible eyes.
Whether you’re whipping up something for a classroom treat, a Halloween dessert table, or a surprise snack for the kids, these mummy Oreo balls are equal parts delicious and adorable. They’re no-bake, easy to make ahead, and require just a few pantry staples.
Why You’ll Love This Mummy Oreo Balls Recipe
This recipe is not just tasty, it’s also incredibly easy and versatile. You only need three main ingredients, and you don’t even have to turn on the oven. Plus, decorating them into cute little mummies adds a creative touch that makes the process as enjoyable as the result. They’re also freezer-friendly, making them perfect for prepping ahead of time.
What Kind of Oreos Should I Use?
You can use classic Oreos for the most traditional flavor, but feel free to experiment with other varieties like Golden Oreos or seasonal flavors if you want a twist. Just avoid the “Double Stuf” versions as they add too much moisture and can make the mixture overly soft.
Ingredients for the Mummy Oreo Balls
To make these delightful Mummy Oreo Balls, you’ll only need a handful of ingredients. Each one plays a key role in flavor and structure.
- Oreos
- Cream cheese
- White melting chocolate
- Candy eyeballs
- Optional: coconut oil or shortening
Oreos provide the cookie base and rich chocolate flavor that makes up the bulk of the filling. Cream cheese acts as a binder, making the crushed cookies into a soft dough-like consistency. White melting chocolate is what you’ll use to coat and decorate the mummies, creating that ghostly finish. Candy eyeballs bring the cute spooky look to life, and a little coconut oil can be added to the melted chocolate for a smoother drizzle.

How To Make the Mummy Oreo Balls
Step 1: Crush the Oreos
Add your Oreos to a food processor and pulse until they form fine crumbs. You want the texture to resemble coarse sand.
Step 2: Mix in the Cream Cheese
Add softened cream cheese to the Oreo crumbs and blend until fully combined. The mixture should come together into a soft, doughy ball.
Step 3: Form the Balls
Using a small cookie scoop or spoon, portion the mixture into equal pieces and roll into smooth balls. Place them on a baking sheet lined with parchment paper.
Step 4: Chill
Pop the tray in the freezer for about 20 minutes, or until the balls are firm enough to dip.
Step 5: Dip in White Chocolate
Melt the white chocolate in a microwave-safe bowl. Use a fork or dipping tool to coat each Oreo ball, tapping off the excess before placing back on the tray.
Step 6: Add Eyes and Drizzle
While the coating is still soft, gently press candy eyes into each ball. Once set, use extra melted white chocolate to drizzle mummy-like lines across the top.
Step 7: Let Set
Let the mummy Oreo balls rest at room temperature or chill them again until the chocolate drizzle is firm. Then they’re ready to enjoy!
How to Serve and Store Your Mummy Oreo Balls
These mummy Oreo balls are a hit at any spooky season gathering, but they also work beautifully as party favors, lunchbox surprises, or festive desserts. One batch typically makes around 24 balls, which is great for feeding a crowd or freezing extras.
To store, place them in an airtight container and keep in the fridge for up to 1 week. For longer storage, freeze them for up to 2 months. Just thaw in the refrigerator before serving. They hold their shape and taste perfectly either way.
What to Serve With Mummy Oreo Balls?
Hot Chocolate with Marshmallows
The sweetness of the Oreo balls pairs perfectly with a warm mug of creamy hot chocolate.
Apple Cider Punch
Add a little autumn flair to your dessert table by serving these with a spiced apple cider punch.
Halloween Snack Mix
Go all out with a tray of mummy balls surrounded by candy corn, pretzels, and popcorn.
Pumpkin Cheesecake Dip
For another creamy sweet bite, pumpkin cheesecake dip makes a festive partner.
Chocolate Milkshakes
Double up the chocolate vibes with thick chocolate shakes on the side.
Ghost Brownies
Make it a haunted dessert tray with brownies cut into ghost shapes.
Caramel Apples
Add some fruity crunch to the mix with caramel apples on sticks.
Spider Cupcakes
Decorate cupcakes with spiderweb icing and set them beside your mummy Oreo balls for a spooky dessert duo.
Want More Dessert Ideas?
If you’re obsessed with these Mummy Oreo Balls, there are plenty more creative sweets to explore on Mia Plates:
- Ooey Gooey Bars when you want that melt-in-your-mouth texture.
- Cheesecake Deviled Strawberries for a fruity twist with a creamy surprise.
- Cherry-Topped Coconut Macaroons when coconut is calling.
- Reindeer Chow to keep the no-bake fun going.
- Leftover Candy Shortbread Bars as a post-Halloween treat cleanup.
Save This Recipe For Later
📌 Save this recipe to your Pinterest dessert board so you can come back to it any time.
And let me know in the comments how yours turned out. Did you go classic or switch up the Oreo flavor? Did the kids help decorate?
I love seeing how everyone puts their twist on these recipes. Questions are always welcome—let’s make kitchen time fun together.
Explore beautifully curated health-boosting drinks and sweet creations on Mia Recipes on Pinterest and discover your next favorite treat!


Mummy Oreo Balls
- Total Time: 35 minutes
- Yield: 4–6 servings
Description
Quick Roasted Butternut Squash is a flavorful, healthy side dish ready in just 30 minutes. Perfectly caramelized with olive oil, garlic, and paprika, this roasted butternut squash recipe makes the ultimate fall or holiday side. Ideal for gluten-free, vegan, or dairy-free diets.
Ingredients
4 cups butternut squash, cubed
2 tablespoons olive oil
1 teaspoon salt
½ teaspoon black pepper
½ teaspoon garlic powder
½ teaspoon paprika
Instructions
1. Preheat your oven to 425°F (220°C) and line a baking sheet with parchment paper.
2. If not using pre-cut squash, peel and cube the butternut squash into even pieces.
3. In a large bowl, toss the squash with olive oil, salt, pepper, garlic powder, and paprika until evenly coated.
4. Spread the squash in a single layer on the prepared baking sheet, ensuring pieces aren’t crowded.
5. Roast for 25–30 minutes, flipping halfway through, until the edges are golden and the squash is fork-tender.
6. Remove from oven and serve warm, or cool and store for later.
Notes
Perfectly roasted squash needs space on the pan—don’t overcrowd it.
You can add a drizzle of maple syrup before roasting for a sweet twist.
Fresh herbs like rosemary or thyme add extra flavor when tossed in after roasting.
- Prep Time: 10 minutes
- Cook Time: 25 minutes
- Category: Side Dish
- Method: Roasting
- Cuisine: American
Nutrition
- Serving Size: 1 cup
- Calories: 120
- Sugar: 4g
- Sodium: 300mg
- Fat: 7g
- Saturated Fat: 1g
- Unsaturated Fat: 6g
- Trans Fat: 0g
- Carbohydrates: 16g
- Fiber: 3g
- Protein: 1g
- Cholesterol: 0mg