


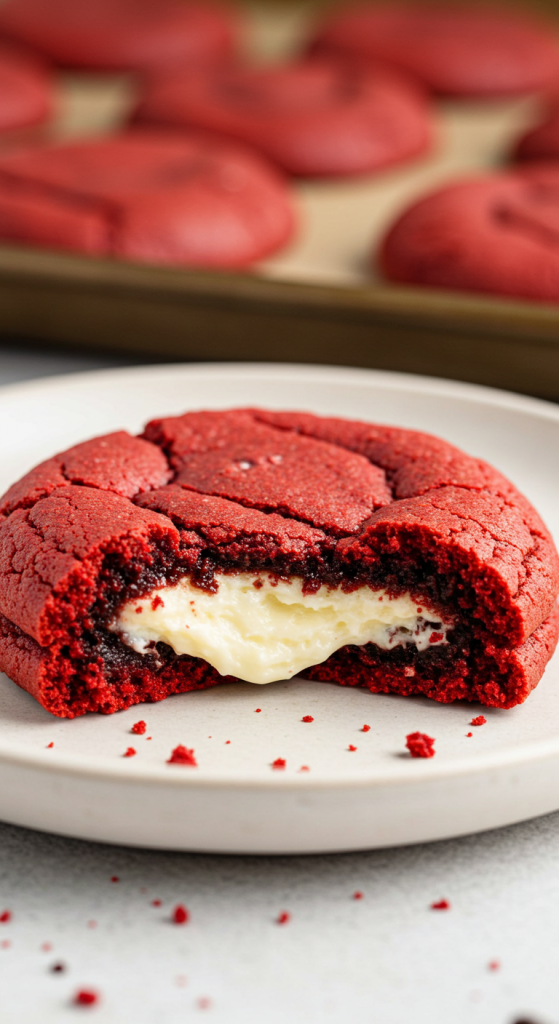
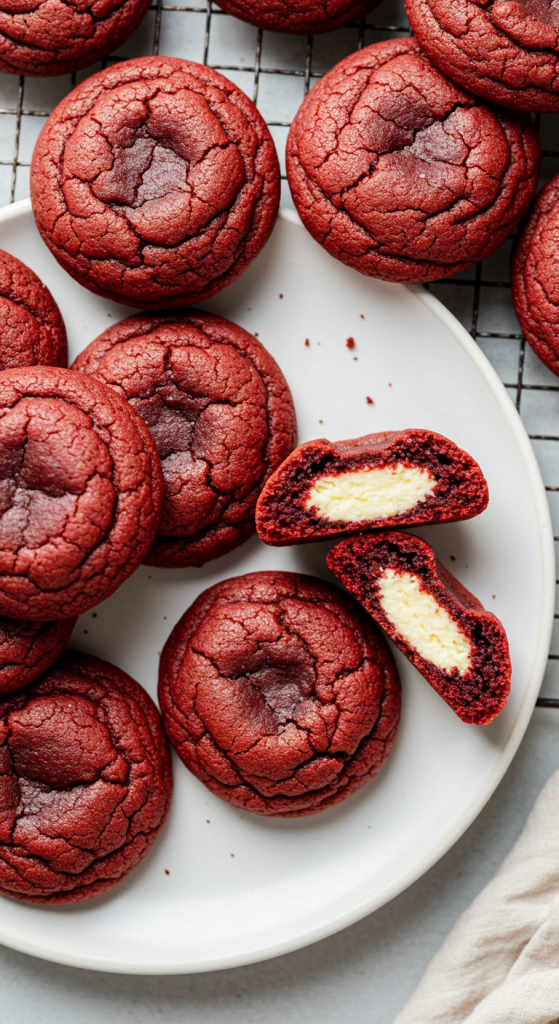
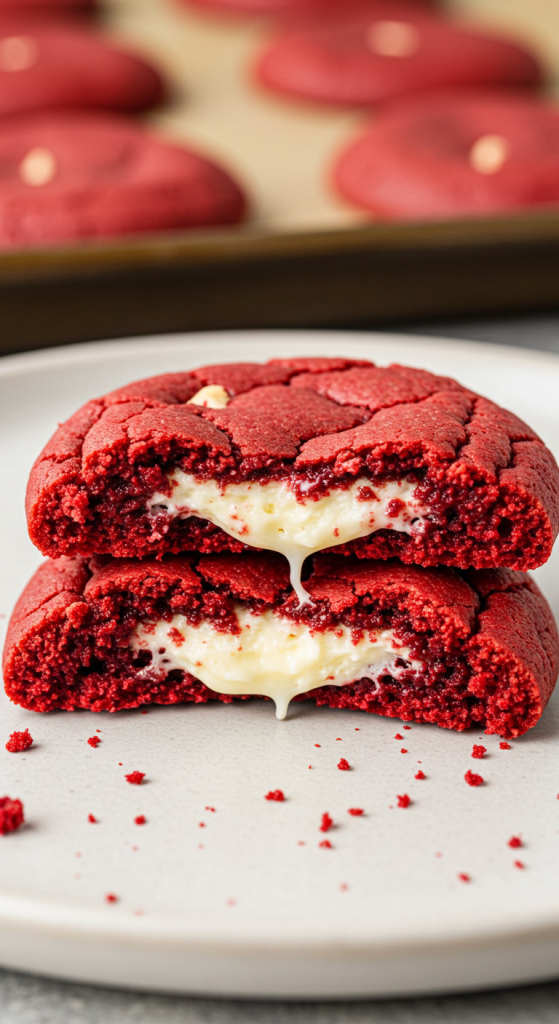
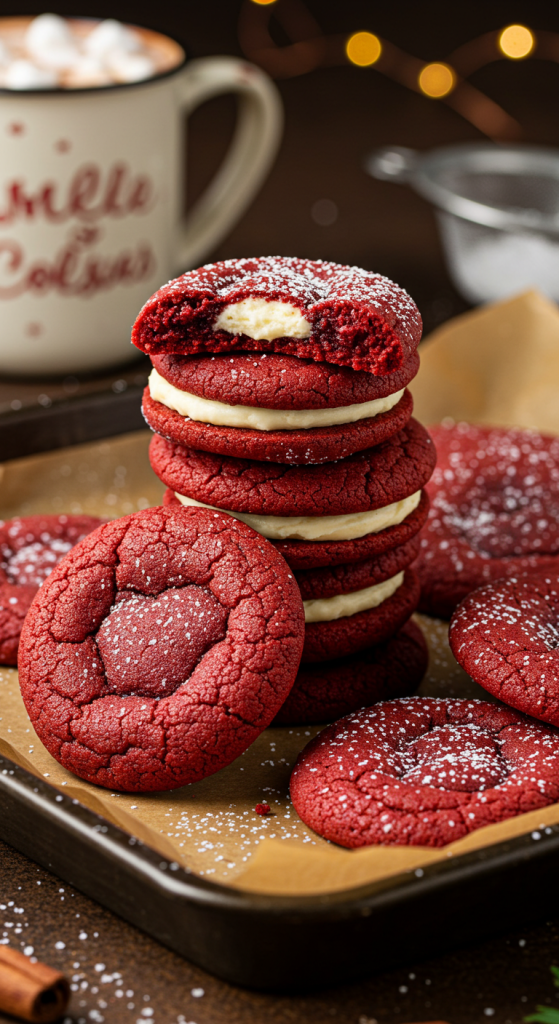
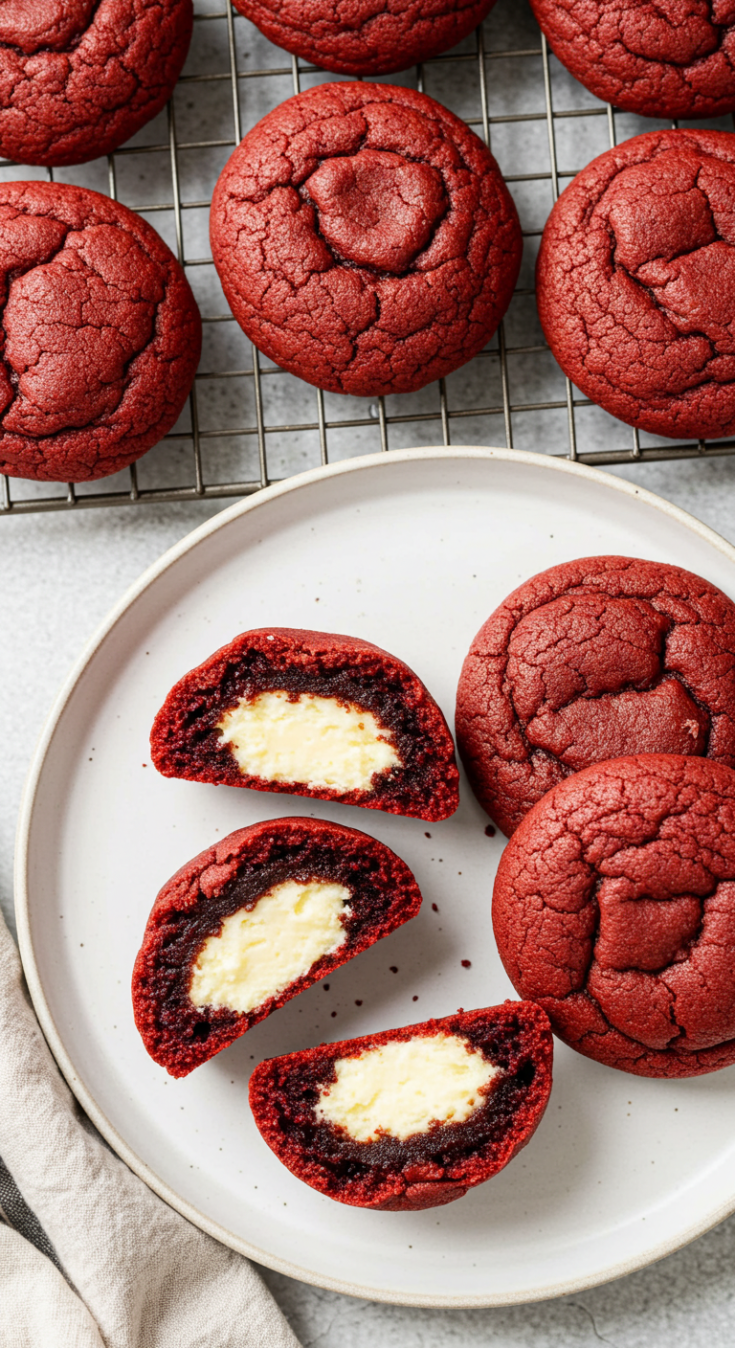
When I first made these Cheesecake Stuffed Red Velvet Cookies, I knew I’d stumbled upon something special. They have the dramatic color and subtle cocoa of red velvet, paired with a creamy cheesecake center that melts into the cookie in the most indulgent way. It’s like biting into your favorite dessert and discovering a hidden treasure inside. They were such a hit at my last holiday party, I barely had time to set them on the tray before they vanished.
There was something magical about mixing the soft dough, wrapping it around the silky cheesecake filling, and watching the transformation in the oven. The smell that fills the kitchen? Pure bliss. Every time I bake them, I can’t help but sneak one straight from the cooling rack. The contrast of the tangy cheesecake against the rich red velvet is simply irresistible.
These cookies aren’t just delicious, they’re conversation starters. Whether you’re baking for Valentine’s Day, Christmas, or just because it’s Tuesday, they bring joy and a splash of color to any moment. And if you’re into festive desserts like ooey gooey bars or mini cinnamon roll cheesecakes, you’re going to adore these.


Why You’ll Love This Cheesecake Stuffed Red Velvet Cookies Recipe
This cookie recipe blends the best of two worlds: the iconic red velvet cake and luscious cheesecake. The dough is soft, slightly chocolatey, and tinted that signature deep red hue, while the center is creamy, sweet, and tangy. Each bite delivers a delightful surprise that will keep everyone coming back for more.
They’re surprisingly easy to make, considering how impressive they look and taste. The ingredients are simple, and you can make the cheesecake filling ahead to streamline the process. These cookies also freeze well, making them great for prep-ahead baking or gifting. Perfect for parties, potlucks, or treating yourself to something extraordinary at home.
Ingredients
Cream cheese: This forms the luscious center of each cookie. Choose full-fat cream cheese for the creamiest, richest texture.
Powdered sugar: Used to sweeten the cheesecake filling just enough without overpowering the tanginess of the cream cheese.
Butter: Softened, unsalted butter gives the cookie dough its rich, tender crumb. Room temperature is best for mixing.
Granulated sugar: Adds the classic sweetness to the cookie dough and helps give it structure.
Brown sugar: Deepens the flavor with a hint of molasses and adds to the soft texture.
Eggs: These bind everything together and contribute to the cookies’ chewy texture.
Vanilla extract: Boosts both the red velvet and cheesecake flavor with a warm, aromatic depth.
Red food coloring: Essential for that iconic red velvet hue. Gel food coloring gives the best, most vibrant result.
All-purpose flour: The backbone of the dough, giving structure to the cookies.
Cocoa powder: A small amount provides that signature red velvet cocoa flavor.
Baking soda & salt: Baking soda helps the cookies rise slightly, and salt balances the sweetness.
How to Make Cheesecake Stuffed Red Velvet Cookies
Step 1: Make the Cheesecake Filling
In a mixing bowl, beat softened cream cheese and powdered sugar together until smooth and creamy. Scoop small spoonfuls onto a lined tray and freeze for at least 30 minutes. This step is essential to easily stuff them into the cookie dough later.
Step 2: Prepare the Red Velvet Cookie Dough
Cream together the butter, granulated sugar, and brown sugar until fluffy. Add the eggs and vanilla, mixing well. Then stir in the red food coloring. In a separate bowl, whisk together flour, cocoa powder, baking soda, and salt. Gradually mix dry ingredients into the wet until just combined. Chill the dough for at least 30 minutes.
Step 3: Assemble the Cookies
Scoop a portion of dough, flatten it slightly, and place a frozen cheesecake center in the middle. Wrap the dough around the filling and seal well to encase the cheesecake completely. Place onto a baking sheet lined with parchment paper.
Step 4: Bake
Preheat oven to 350°F (175°C). Bake the cookies for about 12 to 14 minutes, or until set around the edges but still soft in the center. Allow them to cool on the tray for a few minutes before transferring to a rack.
Step 5: Serve
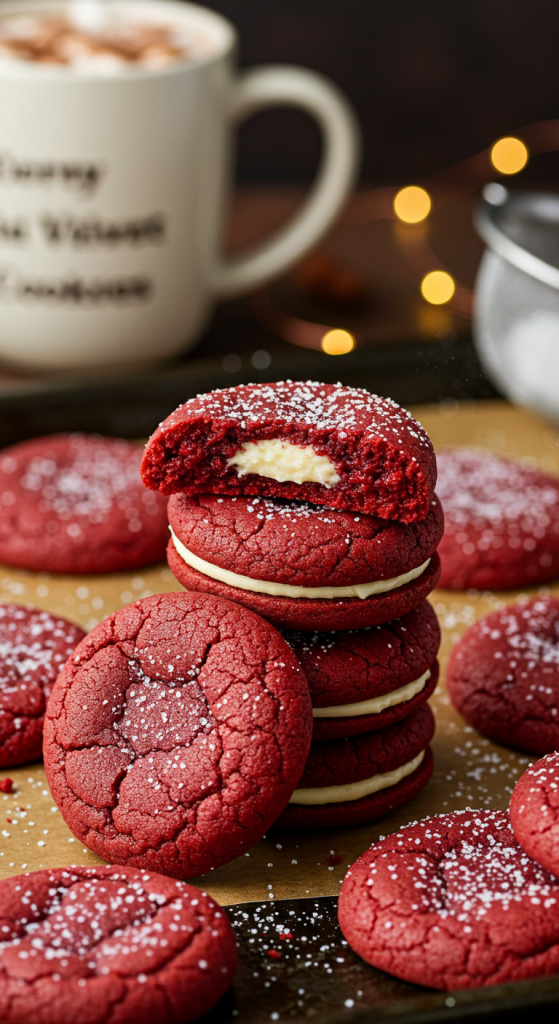
Enjoy warm with a glass of milk, or let them cool completely to reveal that striking cheesecake center. Either way, they’re unforgettable!
Recipe Variations and Possible Substitutions
Want to put your own twist on these Cheesecake Stuffed Red Velvet Cookies? There are a few fun ways to personalize them. Swap out the red food coloring for a deep pink or green for a seasonal spin. You can also use a chocolate cheesecake filling by blending cocoa powder or melted chocolate into the cream cheese mixture.
For a slightly tangier center, add a splash of lemon juice or zest to the cheesecake mix. Don’t have brown sugar? You can use all granulated sugar, though the flavor might be slightly less rich. And for a gluten-free option, simply substitute the flour with a 1:1 gluten-free baking flour blend.
Serving and Pairing Suggestions
These cookies are quite rich on their own, but they shine even brighter with the right pairing. Serve them with a tall glass of cold milk or a warm cup of coffee for the perfect dessert moment. They also make an eye-catching addition to a holiday cookie tray alongside treats like cheesecake deviled strawberries or tiramisu cupcakes.
They can even double as a decadent gift—just wrap them up in a clear bag with a festive ribbon. Trust me, they’ll be the most talked-about item in any gift basket.
Storage and Reheating Tips
Store these cookies in an airtight container in the refrigerator for up to 5 days. The cheesecake center means they need to stay chilled. When ready to enjoy, you can bring them to room temperature or warm them briefly in the microwave for about 10 seconds to recreate that fresh-from-the-oven feel.
They also freeze beautifully. Place the cooled cookies in a single layer on a baking sheet to freeze, then transfer to a freezer-safe container or bag. They’ll keep well for up to 3 months. Just thaw overnight in the fridge or zap in the microwave before serving.
FAQs
How do I keep the cheesecake filling from leaking out of the Cheesecake Stuffed Red Velvet Cookies?
Ensure the dough fully encases the cheesecake filling with no cracks or seams. Freezing the filling before assembly helps keep everything in place during baking.
Can I make Cheesecake Stuffed Red Velvet Cookies ahead of time?
Yes! You can prepare the dough and filling a day in advance and refrigerate them separately. Or, freeze assembled unbaked cookies for up to a month and bake straight from the freezer, adding a few extra minutes.
Can I skip the food coloring in Cheesecake Stuffed Red Velvet Cookies?
You can, though they won’t have that traditional red velvet color. The flavor will still be delicious but the cookies will look more like regular cocoa cookies.
Why is my dough too sticky when making Cheesecake Stuffed Red Velvet Cookies?
The dough might be too warm. Make sure it chills in the fridge for at least 30 minutes before assembling. You can also lightly flour your hands when handling the dough.
Are Cheesecake Stuffed Red Velvet Cookies best served warm or cold?
They’re amazing either way! Warm, they have a soft gooey center. Cold, the cheesecake is firmer and more defined. Try both and see which you love more.
Related Recipe You’ll Like
If you’re loving the decadent combination of cheesecake and a soft cookie base, don’t miss out on ooey gooey bars. They share that same rich, layered indulgence. Another favorite is the mini cinnamon roll cheesecakes, perfect for bite-sized cravings. For something fruity yet creamy, cheesecake deviled strawberries are always a win.
Save and Share This Recipe for Later
Pin this Cheesecake Stuffed Red Velvet Cookies recipe to your favorite Pinterest dessert board so you can always come back to it when those cravings hit. Don’t forget to share the joy—send the link to your baking buddies, post your cookie creations on social media, and tag me so I can see them too! Trust me, your friends and followers will thank you.
Cheesecake Stuffed Red Velvet Cookies
These Cheesecake Stuffed Red Velvet Cookies combine the classic charm of red velvet with the indulgence of a cheesecake core. Each cookie features a vibrant red, cocoa-kissed dough that wraps around a rich and creamy cheesecake center. They're perfect for holiday celebrations, gift trays, or whenever you're craving a luxurious dessert. With their eye-catching appearance and decadent taste, these cookies are a showstopper at any gathering.
Ingredients
- 8 oz cream cheese, softened
- 1/2 cup powdered sugar
- 3/4 cup unsalted butter, softened
- 1/2 cup granulated sugar
- 1/2 cup brown sugar
- 2 large eggs
- 2 tsp vanilla extract
- Red food coloring (gel recommended)
- 2 1/4 cups all-purpose flour
- 2 tbsp cocoa powder
- 1 tsp baking soda
- 1/4 tsp salt
Instructions
- In a bowl, beat the cream cheese with powdered sugar until smooth. Scoop into teaspoon-sized mounds and freeze for 30 minutes.
- Cream butter, granulated sugar, and brown sugar until fluffy. Add eggs, vanilla, and red food coloring. Mix well.
- In a separate bowl, whisk together flour, cocoa, baking soda, and salt. Gradually add to wet ingredients. Chill the dough for 30 minutes.
- Preheat oven to 350°F (175°C). Line a baking sheet with parchment paper.
- Scoop a portion of dough, flatten it, and place a frozen cheesecake ball in the center. Wrap the dough around it and seal.
- Bake 12–14 minutes until edges are set. Cool on the tray for a few minutes, then move to a wire rack.
Notes
- For best results, use gel food coloring for a vibrant red hue.
- Ensure the cheesecake balls are well-frozen to prevent leaks.
- Cookies can be frozen after baking for up to 3 months.
- Bring to room temperature or microwave for 10 seconds to enjoy warm.
Nutrition Information:
Yield:
18Serving Size:
1Amount Per Serving: Calories: 233Total Fat: 13gSaturated Fat: 8gTrans Fat: 0gUnsaturated Fat: 4gCholesterol: 54mgSodium: 153mgCarbohydrates: 27gFiber: 1gSugar: 14gProtein: 3g